Kayak Safety Essentials: The Complete Guide for Paddlers
The complete kayak safety reference: PFDs, cold water, weather, float plans, essential gear, self-rescue, and what to do when things go wrong.
This post contains Amazon affiliate links. We may earn a commission if you buy, at no extra cost to you. Read our disclosure.
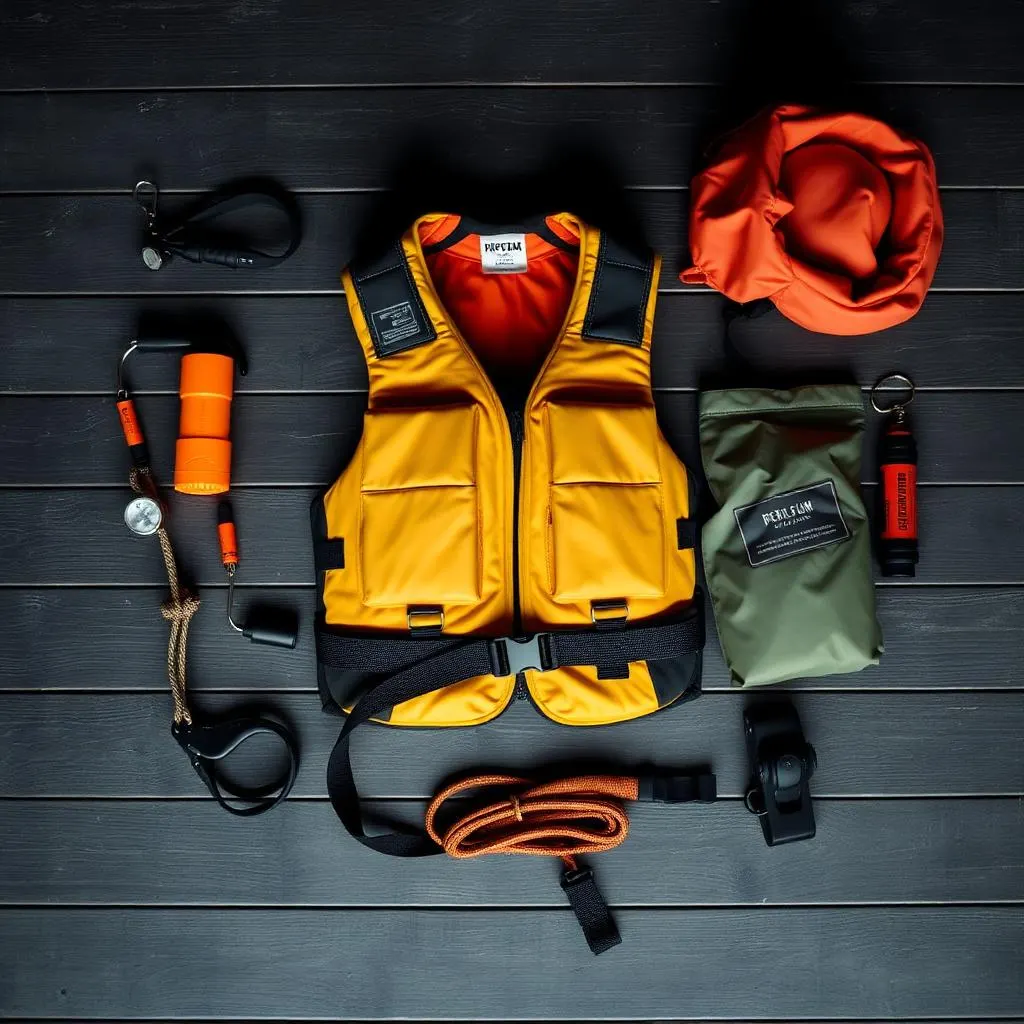
Kayak safety is not complicated, but it is unforgiving of shortcuts. Almost every serious paddling incident comes back to a handful of preventable mistakes: no life jacket, the wrong clothing for the water temperature, weather that was forecast but never checked, and nobody on shore who knew where the paddler went. This guide covers the fundamentals every kayaker should know before launching — whether it is your first trip or your five hundredth.
In this guide:
- Life jackets (PFDs): fit, labels, and the rules
- Cold water: cold shock and the 1-10-1 principle
- Weather, wind, tides, and thunderstorms
- Filing a float plan
- The essential gear checklist
- Self-rescue and re-entry basics
- What to do if you capsize
- Sun, heat, and hydration
- Paddling with kids and dogs
- Alcohol and paddling
- Further reading and authoritative sources
1. Wear a life jacket — every time
A personal flotation device (PFD, or life jacket) is the single most important piece of safety equipment you own. The rule is simple: wear it, do not just carry it. A PFD stowed under a deck bungee cannot help you in the seconds after a capsize, and that is exactly when you need it. Choose a paddling-specific PFD with large arm openings and a short cut that does not ride up when you sit in a kayak seat.
How a PFD should fit
Fit matters as much as wearing it. Put the jacket on, zip and buckle every closure, and tighten the straps until it is snug all around your torso. Then have someone grab both shoulder straps and pull straight up. If the jacket slides up toward your ears or over your chin, it is too loose or too big — tighten it or size down. A PFD that passes the shoulder lift test stays put in the water and keeps your head higher where it belongs. Recheck the fit with the clothing you will actually paddle in; a jacket fitted over a t-shirt can be dangerously loose over a thin rash guard and too tight over a wetsuit.
Understanding the labels: Type I–V and performance levels
In the United States, PFDs are approved by the U.S. Coast Guard, and you will see two labeling systems in stores. The older system sorts life jackets into Types I through V, from high-buoyancy offshore jackets (Type I) down to special-use devices (Type V). Most paddlers in that system wore Type III, the comfortable, mobility-first category designed for conscious wearers in calm, near-shore water where rescue is quick.
The newer system — which you will see on most recently made jackets — labels PFDs by performance level instead: Level 50, Level 70, Level 100, and so on. The number roughly indicates buoyancy in newtons. Level 70 is the category most recreational kayakers fall into: designed for sheltered and inland waters where help is close, comfortable enough to wear all day, and broadly equivalent to the old Type III. Higher levels (100 and 150) add buoyancy and turning performance for rough or offshore conditions. Whichever system is on the tag, the label must say the jacket is USCG-approved, and it must be the right size for your weight and chest.
Inflatable PFDs: read the fine print
Inflatable PFDs — belt packs and suspender styles that inflate when you pull a cord or when they contact water — are popular because they are cool and low-profile. They come with real caveats. They are not approved for children under 16. They are not approved for high-impact sports. Most require the wearer to be conscious enough to pull a cord or swim the jacket over their head after inflation. And they are equipment that must be maintained: the CO2 cartridge and bobbin or inflator mechanism need regular checks and periodic replacement, or the jacket may not inflate at all. For most recreational kayakers, an inherently buoyant foam jacket is the simpler, safer choice — it works even if you are injured, unconscious, or did nothing to prepare it that morning.
2. Respect cold water
Cold water kills more paddlers than rapids, waves, or weather, and it kills on days that look beautiful. The water does not have to be freezing to be dangerous.
Cold shock and the 1-10-1 principle
When you are suddenly immersed in cold water, your body reacts before your mind can. Cold shock triggers an involuntary gasp followed by rapid, uncontrolled breathing — if your head is underwater when the gasp hits, you inhale water. This is the moment most cold-water drownings begin, and it is why a worn PFD matters so much: it keeps your airway above the surface while you get your breathing back.
A useful way to think about the timeline is the 1-10-1 principle:
- 1 minute to get your breathing under control. Do not try to swim hard yet. Float, hold onto the boat, and focus on slowing your breath.
- 10 minutes of meaningful movement. After that window, cold muscles stop obeying you — grip strength and coordination fade fast. Use those minutes to get out of the water or get to shore, not to swim long distances.
- 1 hour (roughly) before hypothermia renders you unconscious, depending on the water temperature and what you are wearing.
The exact numbers vary with conditions and the individual, but the order of operations does not: breathe first, then act quickly, and do not count on a long swim to safety.
Dress for the water, not the air
Air temperature is what you feel standing in the parking lot. Water temperature is what will decide the outcome of a capsize. A warm spring afternoon over winter-cold water is one of the most dangerous setups in paddling, precisely because it feels safe.
A widely used rule of thumb is the 120 guideline: if the air temperature and water temperature added together are below about 120°F, dress for immersion. That means a wetsuit or drysuit, not cotton and a rain jacket. A drysuit with insulating layers underneath offers the most protection in genuinely cold water; a wetsuit works by trapping a thin layer of water your body warms and is a reasonable choice in milder conditions. Either way, avoid cotton entirely — it holds water against your skin and strips heat away. Synthetic or wool layers keep working when wet.
When in doubt, stay close to shore, paddle with others, and choose smaller water until the water warms up.
3. Check weather, wind, and water before you launch
Most weather-related paddling emergencies were forecast. The failure is almost never the forecast — it is not checking it.
What to check
Look at a standard forecast for air temperature, precipitation, and storms, and then look specifically at wind: speed, direction, and how it changes through the day. On coastal waters, large lakes, and anywhere tidal, check a marine forecast as well — the National Weather Service issues them for coastal and Great Lakes waters, and they carry the wind and wave detail a general forecast omits. On tidal water, understand the basics of the tide cycle and any current it creates in the area you plan to paddle; a current that was a gentle push outbound can become a real fight on the way back.
Wind is the kayaker's main weather enemy
Wind matters more to a kayak than almost any other condition. Two patterns deserve special respect:
- Offshore wind. A breeze blowing from land out to open water feels calm and pleasant near shore, because the land shelters you. Paddle out with it and you are in progressively rougher water with a headwind waiting for the return trip. On big lakes and coasts, offshore winds push paddlers out faster than they realize. Be deeply suspicious of any forecast with wind blowing away from your launch shore.
- Building afternoon wind. Many areas are calm in the morning and windy by early afternoon. Plan to be off the water, or at least back near your launch, before the wind builds.
As wind rises, waves rise with it, and beam-on waves (hitting you from the side) are what capsize recreational kayaks. If conditions exceed your skill, the correct decision is to stay on shore. There is always another day.
Thunderstorms
Lightning and open water are a lethal combination, and a paddler is often the tallest object on the water. If thunderstorms are in the forecast, plan a short morning trip or pick another day. If you hear thunder or see lightning while on the water, get off the water at the first safe landing — do not wait for rain. Wait well clear of the water and away from isolated tall trees until the storm has passed.
4. File a float plan
A float plan is a short note that tells someone reliable where you are going and when to start worrying. If you do not come back on time, it is the document that gets rescuers looking in the right place instead of searching an entire coastline.
Include at least:
- Your name, contact information, and a description of you
- The names of everyone in the group
- A description of your kayak (color, length, any markings)
- Your launch point, planned route, and destination
- Your launch time and expected return time
- The time at which your contact should call for help, and who to call (local sheriff, marine patrol, or the Coast Guard)
- Vehicle description and where it will be parked
Leave the plan with a responsible person who will actually notice you are overdue — a family member, friend, or neighbor — not in your glovebox. The U.S. Coast Guard's boating safety site at uscgboating.org publishes a float plan template you can copy. Then do the easy part: stick to the plan, or tell your contact when it changes.
5. The essential gear checklist
This is the kit that belongs on every recreational kayak trip. Conditions and trip length will add to it, but nothing here is optional for a day on the water.
- PFD — USCG-approved, properly fitted, worn (see Section 1)
- Whistle or sound signal — attached to your PFD; a sound-producing device is a USCG carriage requirement and carries far further than your voice
- Light — a white light such as a waterproof flashlight or 360° light, required between sunset and sunrise and in restricted visibility
- Bilge pump or sponge — to empty a swamped cockpit; essential for sit-inside kayaks
- Paddle float — an inflatable or foam float that turns your paddle into an outrigger for solo re-entry (see Section 6)
- Spare paddle — even a compact take-apart paddle beats hand-paddling home
- Dry bag with phone or VHF radio — your phone in a waterproof pouch for near-shore paddling; a marine VHF (and the knowledge to use it) for coastal and open water
- First aid kit — in a waterproof container
- Water — more than you expect to drink (see Section 8)
- Sun protection — sunscreen, sunglasses with a retainer, a brimmed hat, and UPF clothing
- Clothing matched to the water temperature — wetsuit or drysuit when the water calls for it (see Section 2)
- Bow and stern flotation — float bags for sit-inside kayaks without sealed bulkheads, so a swamped boat still floats level enough to empty
- Tow line or throw line — for helping another paddler, and so another paddler can help you
If you are still choosing a boat, our kayak buyer's guide covers which hull features — sealed bulkheads, deck rigging, cockpit size — make this kit easier to live with.
6. Self-rescue and re-entry basics
Knowing how to get back into your kayak from the water is what turns a capsize from an emergency into a story. This section is an overview, not a substitute for instruction: practice these skills in warm, shallow water with a partner before you ever need them for real, and consider a hands-on course from an American Canoe Association instructor.
Sit-on-top re-entry
Sit-on-top kayaks are the most forgiving to re-enter, which is one reason they dominate warm-water recreation. After a capsize, flip the boat upright, position yourself alongside the seat area, kick your legs to bring your body flat on the surface, and pull your chest across the deck. Once your torso is aboard, roll over, swing your legs in, and sit up. It looks ungainly and works surprisingly well — but only if you have actually done it before.
Sit-inside: wet exit and paddle-float rescue
In a sit-inside kayak, a capsize starts with the wet exit: lean forward, pull the spray skirt's grab loop if you are wearing one, and push yourself out of the cockpit while holding your paddle. The boat will be full of water, which is why a solo re-entry usually relies on a paddle float. In outline: inflate or fit the float over one paddle blade, lay the paddle across the deck behind the cockpit with the float as an outrigger, secure the free end, and use the supported paddle as a brace while you kick up and slide into the cockpit. Then pump the boat out with your bilge pump, refit the skirt, and stow the float.
Both techniques share one truth: they are easy in a warm pool in July and very hard in cold, choppy water in April. Practice closes that gap.
7. If you capsize
Whatever the water temperature, the priorities after a capsize are the same:
- Stay with the boat. A kayak is large, visible, and floats. It is far easier for rescuers to spot than a swimmer, and it will support you even when swamped. Never try to swim to shore and leave the boat behind unless shore is genuinely close and conditions are mild.
- Keep hold of your paddle if you can, but never let go of the boat to chase it.
- In cold water, get out of the water fast. Use your practiced re-entry. If you cannot re-enter, get as much of your body onto the overturned hull as possible to slow heat loss, and use your whistle or VHF to call for help.
- Signal early. Three blasts on a whistle is a recognized distress signal. Do not wait until you are exhausted to start signaling.
If you are paddling with others, raft up: the group stabilizes the swimmer, helps with re-entry, and shares warmth.
8. Sun, heat, and hydration
Water reflects sunlight back at you, so a day of paddling delivers more UV exposure than the same hours on land. Sunburn and heat illness are the most common kayaking injuries by far, and both are preventable.
Wear a broad-spectrum, water-resistant sunscreen and reapply it through the day, including the backs of your hands, the tops of your legs, and under your chin — reflection hits all of them. Polarized sunglasses cut glare and let you see into the water; attach a retainer so they survive a capsize. A brimmed hat and a long-sleeve UPF shirt beat sunscreen alone for all-day exposure.
Bring more water than you think you need and drink on a schedule, not when you feel thirsty — by then you are already behind. On hot days, watch yourself and your partners for the early signs of heat exhaustion: headache, dizziness, nausea, and cramps. The fix is shade, rest, and fluids. Confusion, hot dry skin, or collapse signals heat stroke, which is a medical emergency — get off the water and get help.
9. Paddling with kids and dogs
Sharing a kayak with a child or a dog is one of the great pleasures of the sport, and it adds a few non-negotiable rules.
Kids need a properly sized, USCG-approved child or youth PFD — never an adult jacket cinched down, and most states require children to wear it at all times. Fit it with the shoulder lift test from Section 1. Start with short trips on small, calm, warm water, ideally with two adults so one can focus entirely on the child. Teach them to sit still, keep their hands inside, and what to do if the boat tips. If you are new to paddling yourself, our beginner's guide to choosing a first kayak covers stable, family-friendly boats that make these first trips easier.
Dogs should wear a dog-specific PFD with a handle on the back — the handle is how you haul a wet dog back aboard without injuring it or capsizing yourself. Introduce the boat on land first, keep early trips short and calm, and bring fresh water for the dog. One rule above all: never tether a dog to the kayak. In a capsize, a leash ties a panicking animal to a boat it cannot escape from. The dog floats free in its PFD, and the handle brings it back.
10. Never paddle impaired
Alcohol and paddling do not mix, full stop. Alcohol impairs the balance, judgment, and coordination that keep you upright; it accelerates heat loss in cold water by dilating blood vessels at the skin; and it is a factor in a large share of boating deaths every year. Boating under the influence laws apply to paddlers in many states, but the legal risk is the smallest part of it — the physical risk is the point. Save the beer for after the boats are loaded.
11. Further reading: authoritative sources
This guide is a starting point. These organizations publish the primary material on paddlesports safety, and they are worth bookmarking:
- U.S. Coast Guard Boating Safety — federal carriage requirements, PFD rules, float plan templates, and accident data
- American Canoe Association — paddlesports education, instructor certification, and safety courses you can take in person
- National Center for Cold Water Safety — the definitive resource on cold shock, immersion, and dressing for water temperature
- National Weather Service marine forecasts — wind, wave, and storm forecasts for coastal and Great Lakes waters
Frequently asked questions
Do I legally have to wear a life jacket in a kayak?
Federal rules require a properly fitted, USCG-approved PFD on board for every paddler, and most states require children to wear one at all times; some states require adults to wear them in certain seasons or waters. Regardless of the letter of the law, wear it — a PFD stowed under a bungee saves nobody.
What water temperature is too cold to kayak without a wetsuit or drysuit?
There is no single number, but cold shock risk rises sharply as water drops below roughly 60°F, and the 120 guideline is the practical test: if air plus water temperature is under about 120°F, dress for immersion. Water temperature matters far more than air temperature, so a warm spring day over cold runoff water still calls for a wetsuit or drysuit.
What is the 1-10-1 principle?
It is a simple way to remember what cold-water immersion does to you: about 1 minute to get your breathing under control after the initial cold shock, roughly 10 minutes of useful muscle movement before the cold takes your strength and coordination, and about 1 hour before hypothermia can cause unconsciousness. It is a guideline, not a guarantee — but it tells you the right order of actions: breathe, act fast, do not count on a long swim.
What is the single most overlooked piece of kayak safety gear?
A whistle attached to your PFD. It costs a few dollars, satisfies the USCG sound-signal requirement, and carries far further than your voice — which is exactly what you need when a motorboat has not seen your low-profile kayak.
Keep Reading
Related articles
What to Wear Kayaking: The Ultimate Season-by-Season Guide
How to Choose a Kayak: The Complete Buyer's Guide
How to Store a Kayak: Indoors, Outdoors & Over Winter
Next up: What to Wear Kayaking: The Ultimate Season-by-Season Guide, The Complete Buyer's Guide, and to Store a Kayak.